In this fine tutorial, you’ll learn how to use Shopify. Find out what Shopify is and how it functions.
Are you ready to learn to design a Shopify store? Perhaps you’ve just come up with a fantastic product idea and want to check if others will buy it. You’re in luck, because you don’t need to be a skilled web developer to create a Shopify store in under 15 minutes.
What is Shopify?
Shopify is an eCommerce platform that enables any individual to set up an online storefront and sell their products and services. Business owners can also sell their products and services in person with Shopify POS.
Tobi, the creator of Shopify, started the company over ten years ago when he wanted to sell snowboards through his company, Snowdevil. He quickly realized that without an easy-to-use eCommerce platform, selling snowboards online was extremely difficult and stressful. As a result, he decided to create it himself, and Shopify was born.
How does Shopify work?
Shopify operational functionality takes place on a monthly subscription basis Software as a Service (SaaS) model. Because it’s a cloud-based solution, you won’t have to worry about updating or maintaining software or web servers.
This enables the user to access and manage the online storefront from any location with an internet connection. With Shopify’s online store development and creative themes, you can modify the look and feel of your entire online store. In little then 15 minutes, users can have their own Shopify store.
Shopify Pricing – What is the overall cost of Shopify?
The following is a breakdown of each plan’s pricing:
- Lite Plan:- $9 per month + a Buy button
- Basic Shopify Plan:- $29 per month + 2.9% and 30¢ per transaction
- Shopify Plan:- $79 per month + 2.6% and 30¢ per transaction
- Advanced Shopify Plan:- $299 per month + 2.4% and 30¢ per transaction
- Shopify Plus Plan:- Pricing plans start around $2000 per month + 2.15% per transaction
How to Create Your Own Shopify Store
Step-by-step instructions for developing a Shopify website from the ground up.
We think Shopify is a fantastic eCommerce platform, and there’s a reason it’s at the top of our list. Setting up an eCommerce site used to take a lot of time and effort, as well as a lot of knowledge. Today, however, that has changed, and it merely takes a few minutes to set up an online store. You can design your own online store with a few mouse clicks and a little typing.
We think Shopify is a fantastic eCommerce platform, and there’s a reason it’s at the top of our list. Setting up an Shopify Store site used to take a lot of time and effort, as well as a lot of knowledge. Today, however, that has changed, and it merely takes a few minutes to set up an online store.You can design your own online store with a few mouse clicks and a little typing.
The Ultimate Guide to Use Shopify in 2024
Step 1: Sign Up for Shopify
The foremost step in getting your Shopify storefront up and running it in the simplest ways. To get started with Shopify store, all you have to do is create an account.
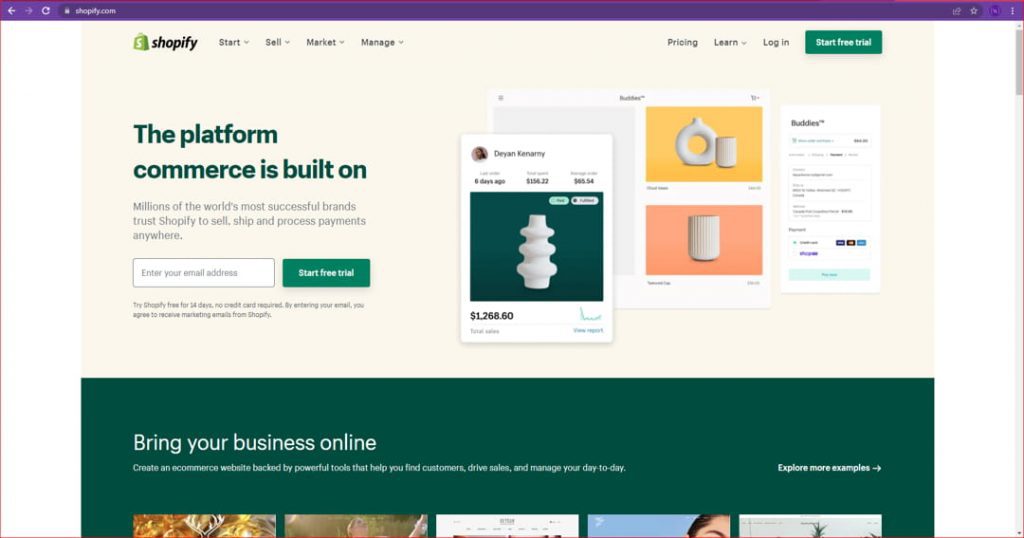
Go to the Shopify website and select the Get Started option. Fill up the email address, password, and store name that you want.
Remember that you must opt for a specific name for your storefront or Shopify will refuse to let you acquire the domain.
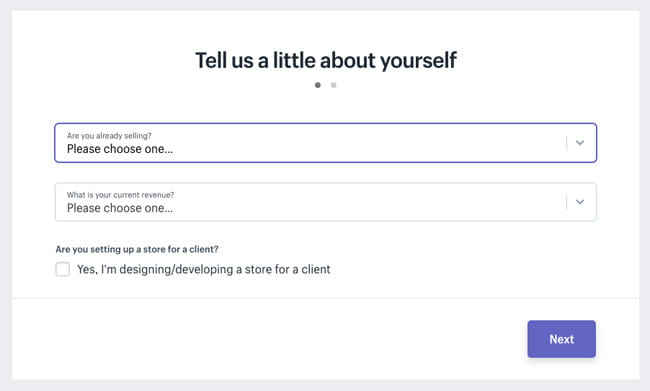
After clicking Next, inform Shopify about yourself by stating how much you plan to sell and whether or not you are currently selling. When you’re done with this, click the Enter My Store button.
It will then ask the user if they want to open a physical business or a digital store. We’re only going to establish an online shop for this tutorial, so choose that option and click Next. On the next page, you’ll be asked to provide personal information such as your name, address, and phone number, which will be needed to set up currencies and tax rates.
Step: 2 Get well-versed with the Dashboard
You’ll use the Shopify dashboard to create your store, add products, manage orders, establish shipping rates, install apps, and much more. This is where you’ll finish all of the tasks for your new eCommerce store.
Step: 3. Choose Your Store’s Design
You’ll use the Shopify dashboard to create your store, add products, manage orders, establish shipping rates, install apps, and much more. This is where you’ll finish all of the tasks for your new eCommerce store.
Although the theme collection isn’t as extensive as WordPress’s, it is of higher quality, as each theme is reviewed by the Shopify team. All of the themes you’ll discover here include complete designer assistance. The free themes demonstrate all of the necessary changes you can make to your theme without touching a line of code. If you want even more features and customization, you might consider purchasing a premium theme.
Here’s how to choose the right theme for your online shop:
Spend some time looking through the theme store
Hundreds of different themes from various industries are available in the theme store. You may sort by category, whether the theme is free or premium, and even by specific characteristics.
Examine Each Theme in Light of Your Objectives
Every online store owner will have distinct objectives in mind. There are a variety of layouts to choose from, however some will have a full-width slider while others will go straight to the products. Some websites may not even contain products on the home page. Before you start exploring through the vast marketplace for a theme, be sure you know what you’re looking for.
Theme Demonstration
You can test a theme before deciding to put it on your site if you think you’ve found it. You’ll be able to see how the layout works in real time, as well as how the navigation works. If you like a theme, click ‘View demo’ to see it in action.
Customizing Your Theme
It’s time to start customizing once you’ve discovered the perfect theme.
Making a replica of your current theme is a great thing to do before you start customizing it. That way, if you make changes you don’t like, you can simply roll back to the previous version. Go to Online Store>Themes, then scroll down and click Actions>Clone to duplicate your theme.
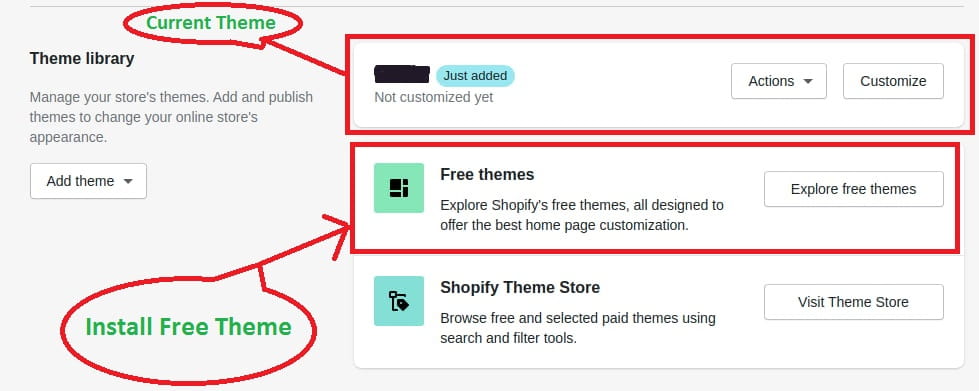
You’ll go to Online Store>Themes to personalize your theme. Then select ‘Customize‘ from the drop-down menu.
Once you’ve arrived at the theme customization page, you can begin altering the layout and look of your store.
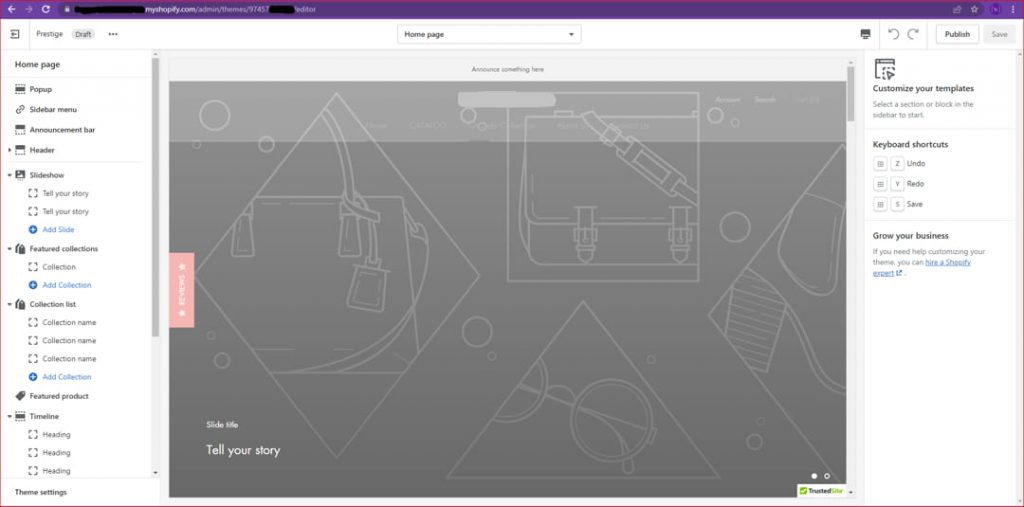
You can change the look and feel of your theme in a variety of ways. In general, premium themes have more customization possibilities than free themes. Some typical items you’ll want to change, for example, are:
- The logo of your store
- Your color scheme as a whole
- The featured image or homepage slider
- The way the products appear on the home page
- Activating product features that are relevant
- Altering the fonts
- Incorporating an email subscription box…..and much more.
Step 4. Setup Your Store’s Settings in an Ideal Way
Shopify comes with some pretty cool stock options. You can improve them whenever you want to get the most out of your store.
Here’s how to alter your “out of the box” preferences. Return to your home dashboard and select “Settings” from the bottom-left corner.
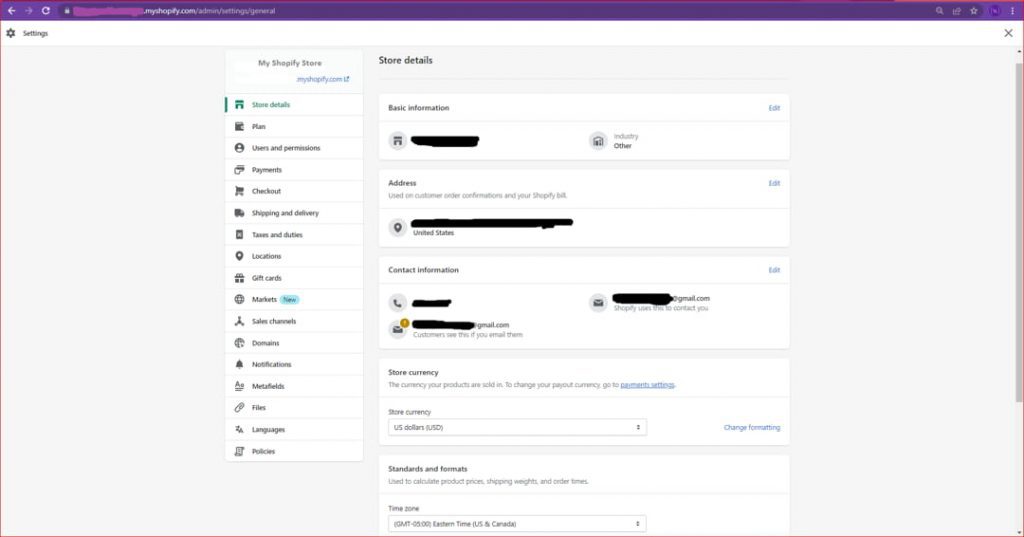
This will open a window where you may change all of your store’s settings.
- Store Details:- You can modify the name of your storefront, contact information, and currencies here.
- Payments:- You’ll set up and manage your various payment suppliers here.
- Checkout:- You’ll set up and manage your various payment suppliers here.
- Shipping and delivery:- You’ll be able to control shipping costs, how you ship, create packing slips, and even integrate with distributors from this page.
- Policies:- You can use this section to build and manage pages such as your refund, privacy, shipping, and terms of service.
- Sales channels:- You can link your store to many sales channels here, including social media, Amazon, eBay, and others.
- Taxes and duties:- You’ll set up how you compute and charge sales taxes all around the world in this section.
Step 5. Design the Right Pages for Your Store
You’ve discovered the ideal theme for your online store and have perfected your settings. It’s now time to start building your website’s pages.
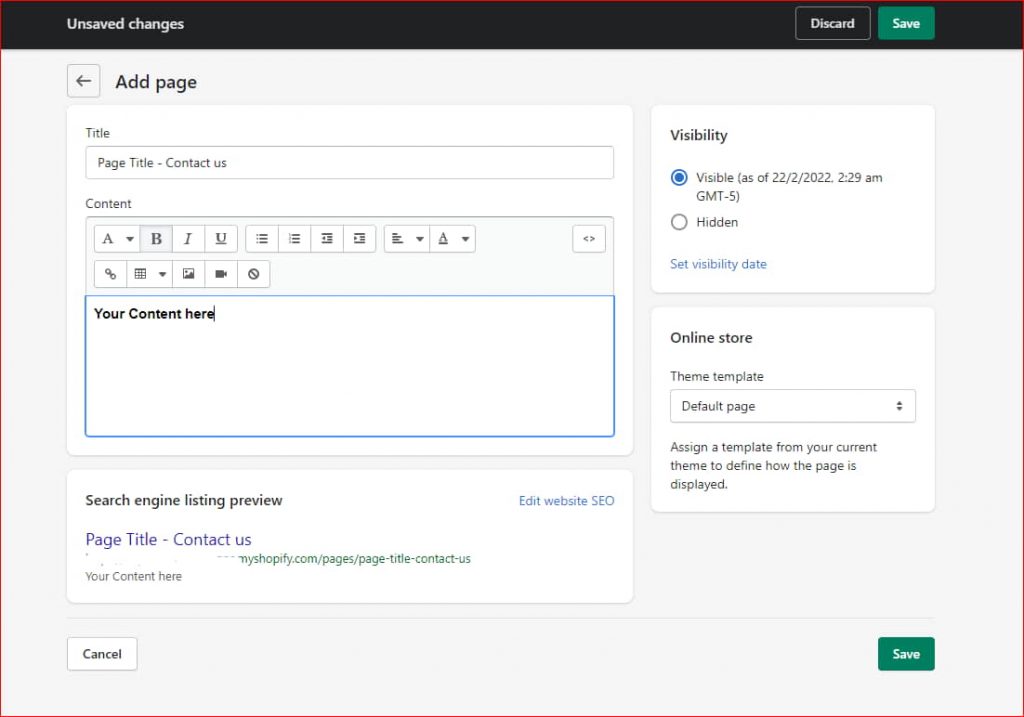
Go to Online Store>Pages to create a page. Then, on the large ‘Add Page‘ icon, click.
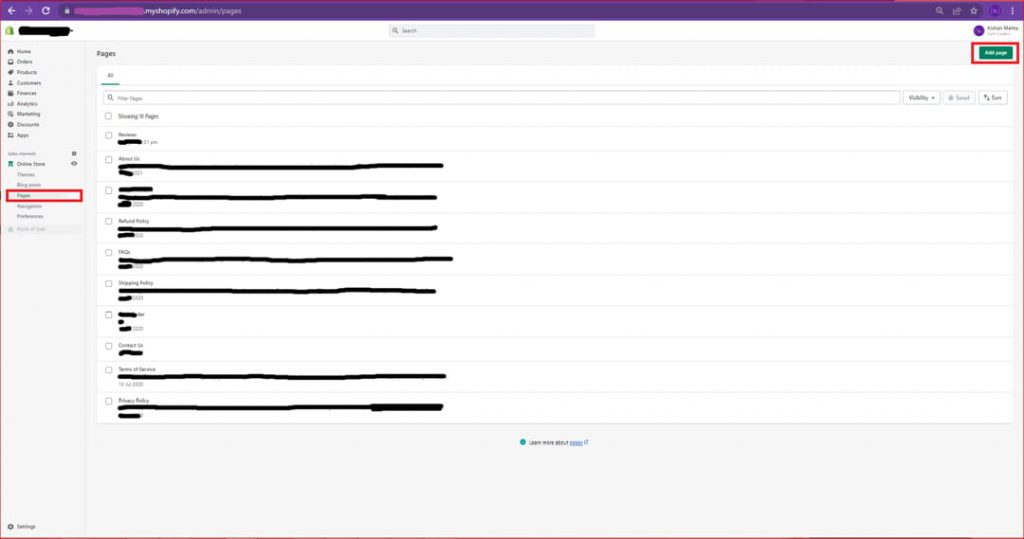
On the next screen, you’ll be able to name your page and add content to it. It’s a rather simple process.
You’ll probably want to make more pages now than what we’ve covered so far. However, the following three pages are the most important pages that every online store should have.
- Contact us page:- This page can be as simple as a contact form or as sophisticated as sharing your story and a brief overview of who we are.
- Shipping policy page:- This page details your shipping policies, pricing, destinations, and more.
- About us page:- This page will tell your motive and explain the “why” behind your store and why you sell the products you do.
Step: 6. Adding Products to Your Store
It’s time to start adding products and services for your store now that you have a good design in place. Select the ‘Products‘ tab from the left-hand side of your dashboard. Then you’ll notice a big blue button in the middle of your screen that says ‘Add product.’

This will take you to a new product page where you can fill in all of the details about your product.

It’s eminent to provide as much information on the product or service as possible. Consider the difference between shopping online and shopping in a store. You can hold a product in your hand, read the package, and even look up reviews online as you’re checking it out in person.
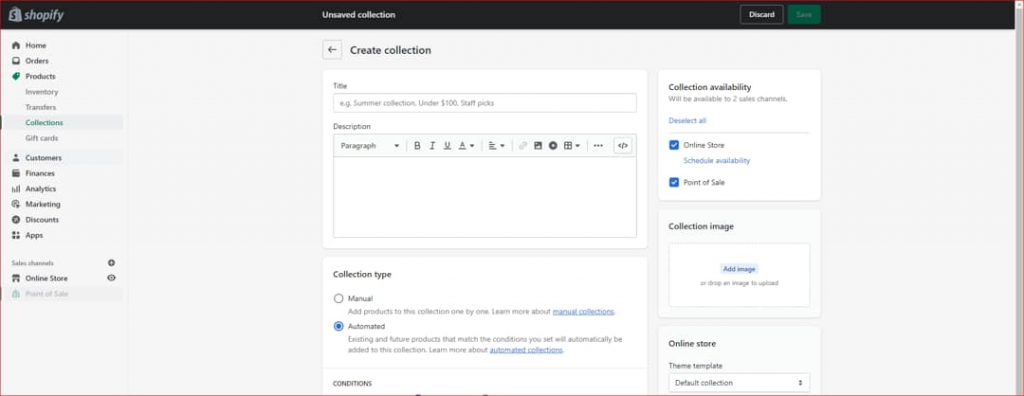
Creating a Product Collection
You’ll probably want to build service collections unless your business only offers a few products.
- These are collections of products that work well together or are distinguished by certain characteristics. Clothing designed specifically for men or women, furnishings designed for specific rooms in the house, seasonal products, and so forth.
- Consider your product collections to be distinct types of products. These collections will be available as options in your navigation menu or as parts of your home page. If your company caters to a variety of specialties, this is a wonderful method to split your site so that your customers don’t have to sift through your entire inventory to locate what they’re searching for.
- A collection can be created in one of two ways: manually or automatically. To make a collection, go to Products>Collection and then ‘Create Collection.’
- With manual, you specify the collection to which you want a product to be included, but with automated, you create a set of conditions that will add products automatically if they meet those conditions.
Step: 7. Setting Up Your Domain Name
When your visitors wish to visit your store, they will type your domain name into their browsers.Your domain name should, ideally, be the same as the name of your storefront.
If you already own a domain that you acquired from another registrar, you can point the name servers to the Shopify servers. If you don’t already have a domain name, you can get one through Shopify.
This is arguably more convenient because your domain, hosting, and other services will all be in one location.
If you’re having trouble coming up with the right domain name, have a look at our guide to finding the perfect domain name.
Go to Home>Add Domain to add a domain name to your Shopify store.
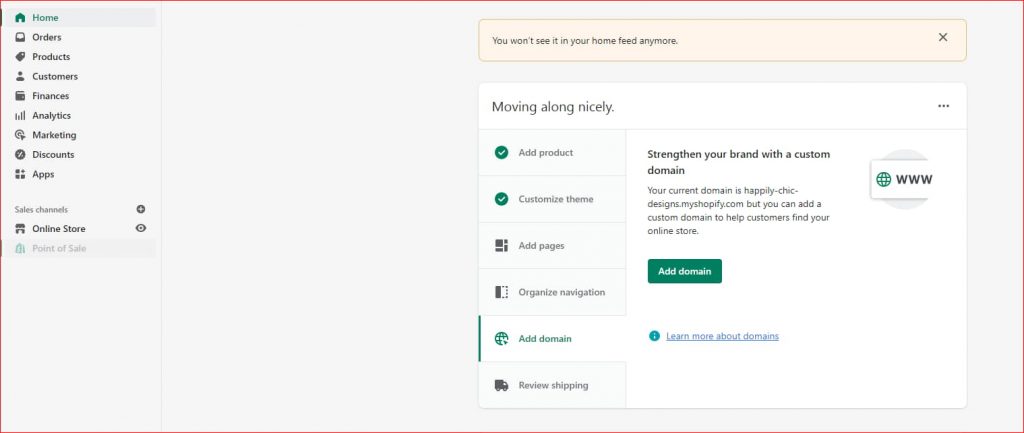
You can connect a current domain or acquire a completely new domain with Shopify here.
Step: 8. Syncing Up Your Payment Processor
By now, your store is almost ready to open. On the left-hand side of your dashboard, go to Settings>Payment providers to set up a payment processor.
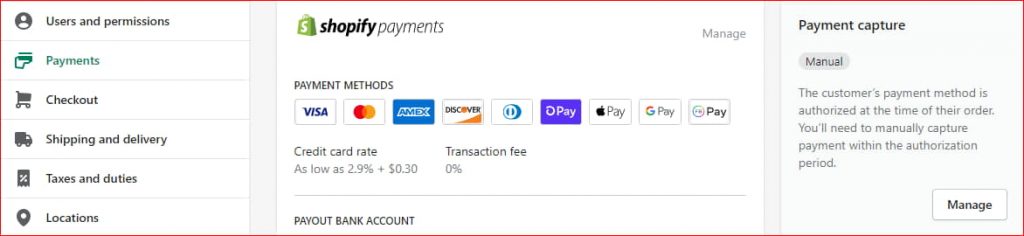
Below, we look over the options to how to choose the ideal payment processor for your purposes, so if you’re not sure what would work best for you, keep reading before you set up your payment gateway.
Step: 9. Integrating Google Analytics
You’ll want to integrate Google Analytics with your Shopify store before you open it to the public. Once your store begins to receive visitors, you’ll be able to look through a wealth of helpful analytics data, such as which pages are receiving the most traffic, which items are generating the most sales, how your audience is behaving, and much more.
You’ll need a Google Analytics account to connect Google Analytics and Shopify. If you don’t already have an account, go to this page and create one. From your Shopify dashboard, go to Online Store>Preferences after you’ve created an account. Then go for the Google Analytics section and paste your Google Analytics code there.
Step:10. Launching Your Store
You should be able to launch your store now that you’ve taken care of everything listed above. Here’s a quick rundown of what you should have done before going live:
- A high-quality theme that you’ve tailored to your preferences
- An attractive domain name and the name of your online store
- You have a small number of products that you have uploaded and optimized.
- Your main site pages have been constructed, and perhaps a few blog articles have been published.
- You’ve filled in all of your store’s pertinent information, including shipping and tax information.
Spend time looking over each page of your site to ensure that all of your links work and that there are no obvious mistakes. You should also test your payment processor to ensure that it is ready to receive payments.
Navigate to Settings>Payment providers to do so. Then click ‘Manage‘ in the Shopify Payments section. Locate ‘Test mode‘ on this screen, then click ‘Enable test mode‘.
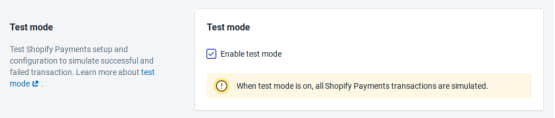
Now, pretend to be one of your customers and place an order to check whether it goes through.
“Thanks to Shopify, you now have a beautiful and effective web store with all of the latest features and functions!!”
We go over discount codes, shipping, the app store, and more in depth below. So, if you’re interested in learning more about Shopify and its features, stay reading.
Finally, let the world know about your Shopify store!
If you’ve made it this far, congratulations on becoming a Shopify master. At the very least, you’ve progressed far beyond the initial stages.
Starting an online store may be a thrilling experience, and hopefully the information in this article has aided you in getting your Shopify store up and operating quickly.
Now it’s time to start driving traffic to your site so you can start making money!