Custom Engagement Solutions
Unlock tailored solutions with a free, no-obligation strategy session.
Expert Developers & Engineers on Demand
Scale Your Team with Skilled IT Professionals
Expert Guidance for Digital Transformation
Custom Engagement Solutions
Unlock tailored solutions with a free, no-obligation strategy session.
Expert Developers & Engineers on Demand
Scale Your Team with Skilled IT Professionals
Expert Guidance for Digital Transformation
Custom Engagement Solutions
Unlock tailored solutions with a free, no-obligation strategy session.
Expert Developers & Engineers on Demand
Scale Your Team with Skilled IT Professionals
Expert Guidance for Digital Transformation
Data-Driven
Success Stories
See What We Built and How it Worked!
Latest Blogs & Insights
Shopify insights that keep you ahead.
Latest News & Announcements
Milestones that push our progress to new heights
Proud to Be Recognized as a Top eCommerce Workplace
Where Global Talent Meets Shopify Brilliance
 INDIA
INDIA
 contact@cartcoders.com
7th Floor, PV Enclave, Opp. Courtyard by Marriott, Off Sindhu Bhavan Road, Bodakdev, Ahmedabad, Gujarat 380054
 USA
contact@cartcoders.com
USA
contact@cartcoders.com
5119 E Coolbrook Ave, Scottsdale, AZ 85254
 CANADA
contact@cartcoders.com
CANADA
contact@cartcoders.com
3120, Kirwin avenue Mississauga L5A3R2
 AUSTRALIA
contact@cartcoders.com
AUSTRALIA
contact@cartcoders.com
2/23 Foster Street, Surry Hills, NSW 2010 Australia.
Get in Touch with Cartcoders
We’re Here to Help You Achieve Your Goals
Global Offices & Dev Hubs
INDIA
contact@cartcoders.com
7th Floor, PV Enclave, Opp. Courtyard by Marriott, Off Sindhu Bhavan Road, Bodakdev, Ahmedabad, Gujarat 380054
USA
contact@cartcoders.com
5119 E Coolbrook Ave, Scottsdale, AZ 85254
CANADA
contact@cartcoders.com
3120, Kirwin avenue, Mississauga L5A3R2
AUSTRALIA
contact@cartcoders.com
2/23 Foster Street, Surry Hills, NSW 2010 Australia.
Shopify is home to over 8,000 apps, and that number keeps growing. From order tracking to product reviews, store owners need tools that solve real problems. Building an app that fits those needs can bring long-term returns—if done right.

But app success isn’t just about coding. You need to follow the right steps, pick the right features, and plan your budget carefully. This blog breaks down the full process—from concept to submission—so you can build a Shopify app that actually gets used.
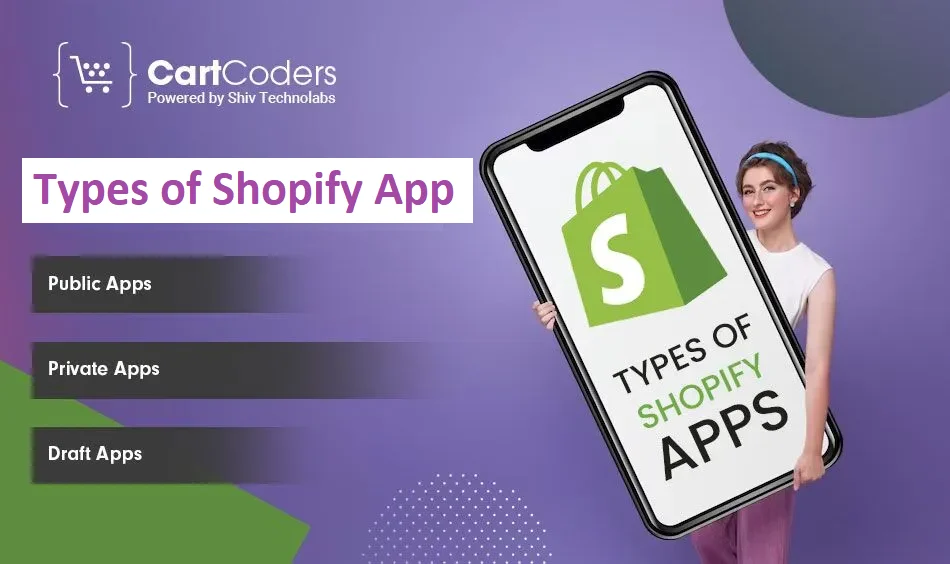
Before building anything, it’s important to know what kind of app you’re making. Shopify apps generally fall into three types. Each serves a different purpose and suits different store needs.
These are available on the Shopify App Store. Anyone with a Shopify store can install them. If you’re targeting a wide audience, this is the way to go. Approval from Shopify is required.
Built for a single store, these apps help merchants with specific needs that public apps can’t solve. They don’t need Shopify’s approval and can be installed directly by the store owner.
Similar to custom apps, but they’re created primarily for internal use or backend integrations. Shopify is phasing these out in favor of custom apps, but they’re still used in legacy setups.
Each app type has its own setup, scope, and distribution method. Knowing where your idea fits helps avoid rework later.
End-to-end development with testing and reliable post-launch support.


Building a Shopify app takes more than writing code. You need a clear plan, the right tools, and a solid understanding of Shopify’s ecosystem.
Here’s a step-by-step breakdown to get started.
Start by identifying the problem your app will solve. Talk to store owners or browse existing apps for gaps. Clear goals help you stay focused during development and improve your chances of success on the Shopify App Store.
Decide whether you’re building a public app, custom, or private app. This choice affects how you write your code, submit the app, and manage access.
To begin development, create a Shopify Partner account. This gives you access to tools like the Partner Dashboard, API keys, and app management features.
Shopify supports a wide range of languages and frameworks. Popular choices include:
Pick tools your team is comfortable with to save time and avoid bugs.
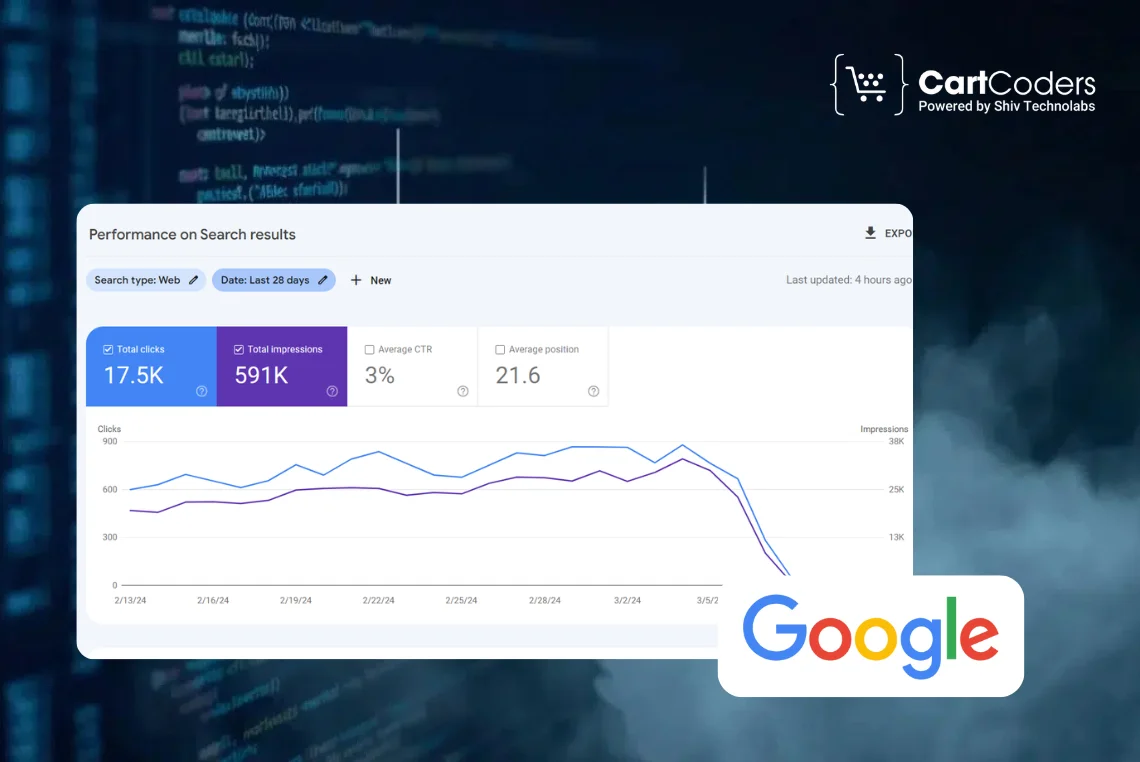
Shopify offers APIs like Admin API, Storefront API, and more. Use webhooks to stay updated on store events like orders or product changes. Make sure your app handles data securely and reliably.
Shopify’s Polaris design system helps you create a UI that fits perfectly into the merchant dashboard. It saves time and keeps your app consistent with the Shopify admin look and feel.
Always test in a development store provided through your Partner account. This helps catch issues early, from permission errors to slow APIs. Consider real store scenarios, not just ideal ones.
If you’re building a public app, Shopify will review your submission. Make sure you meet all their app requirements. Include a privacy policy, a working demo, and proper billing setup if needed.
After approval, publish your app and monitor it. Track performance, user feedback, and crash reports. Use this data to fix issues and roll out updates.
Building a Shopify app involves different types of expenses—from initial planning to post-launch support. Costs vary based on the app’s type, complexity, and the team you hire.
Let’s break it down.
Before you begin development, decide what kind of Shopify app you’re building. Each app type comes with its price range and audience.
| App Type | Development Cost (USD) | Target Users | Submission Required |
| Public App | $15,000 – $35,000 | Global Shopify users | Yes |
| Custom App | $5,000 – $15,000 | Single merchant or store | No |
| Private App | $3,000 – $10,000 | Internal or legacy use only | No |
These are rough estimates. Actual pricing depends on features, timelines, and the development team’s location.
Breaking your budget down by phase helps you track spending more clearly and avoid surprises. Each stage serves a key role in building a fully functional app.
| Development Stage | Estimated Cost Range (USD) | Key Activities |
| Planning & Research | $500 – $1,500 | Requirement gathering, feature planning |
| UI/UX Design | $1,000 – $4,000 | App interface and user experience |
| Frontend Development | $2,000 – $6,000 | Building React/Polaris-based merchant dashboard |
| Backend Development | $3,000 – $10,000 | API setup, logic, third-party integration |
| Testing & QA | $1,000 – $3,000 | Manual and automated testing |
| App Store Submission | $500 – $1,500 | App review fixes, documentation, live demo setup |
A clear cost breakdown by phase helps you manage your project timeline and priorities more effectively.
Your development team’s location affects your budget significantly. Here’s a quick comparison of hourly rates based on region.
| Region | Hourly Rate (USD) | Quality |
| North America | $75 – $150 | High |
| Western Europe | $60 – $120 | High |
| Eastern Europe | $35 – $70 | Moderate to High |
| India & Southeast Asia | $20 – $50 | Budget-Friendly |
If you’re working with a limited budget, hiring from Asia or Eastern Europe can offer strong value without cutting corners.
Building the app is only the beginning. Maintenance, support, and scaling are part of long-term success.
| Service | Monthly Cost (USD) | Why It Matters |
| Hosting | $20 – $200 | Depends on traffic and tech stack |
| App Maintenance | $500 – $2,000 | Bug fixes, API updates |
| Customer Support | $300 – $1,000 | Handling tickets and queries |
| Feature Updates | Variable | Based on new features or Shopify changes |
Regular investment after launch keeps your app functional, secure, and competitive in the Shopify ecosystem.
📌 On average, the total budget to build a Shopify app ranges from $8,000 to $40,000, depending on app type, features, and who builds it.

The apps are meant for solving specific challenges so you must consider your app’s purpose before building it. Determine your end goal in creating the app.
There are two types of apps that can be added to a Shopify store.
Shopify apps generally cost between $8,000 and $40,000 to build, depending on how complex they are. Fewer features lead to lower price range. Average cost is about $20,000.
The apps might take up to a year and hundreds of hours of labor to build based on the difficulty level and features to be implemented. Hiring a professional developer is a wise idea.
Building a Shopify app takes time, skill, and deep knowledge of the Shopify platform. At CartCoders, we’ve helped startups, SaaS teams, and growing brands bring their ideas to life through custom-built Shopify apps.
Here’s what you get when you work with us:
📞 Ready to build your Shopify app?
Building a Shopify app is not just about writing code—it’s about solving a real problem for merchants.
Whether you’re planning a public tool for the App Store or a private solution for a single client, success comes from careful planning, choosing the right tech stack, and following Shopify’s best practices.
Start with a clear goal, break down your budget, and test thoroughly before launch. And remember—ongoing updates and support are just as important as the first version of your app.
If done right, your Shopify app can grow into a solid product that brings long-term value.
Let’s talk about your idea. Get a quote or contact us today.
Yes, if you know web development basics and follow Shopify’s rules, you can build your own app using their tools and APIs.
It usually costs between $8,000 to $40,000, based on features, app type, and the team you work with.
It can be tricky for beginners. But with the right skills in coding and API handling, it’s very doable.
Shopify apps are often built using Node.js, Ruby, PHP, or Python, with front-end parts in React and Shopify Polaris.
Yes, many apps earn well—especially those that solve real problems for store owners and offer solid user support.

Projects delivered in 15+ industries.
95% retention rate, building lasting partnerships.


Serving clients across 25+ countries.
60+ pros | 10+ years of experience.


