When you decide to move from WooCommerce to Shopify, the first concern that comes up is your product data. Every product title, description, variant, price, and SKU you have built over time needs to transfer accurately to your new store, and the idea of something going wrong mid-migration is enough to make most store owners hesitant to start.
WooCommerce to Shopify product import is a well-defined process once you understand how the two platforms handle data differently. Shopify does not read WooCommerce’s export format directly. Variants need to be restructured, image URLs need to be formatted correctly, and column headers need to be remapped before the file works.
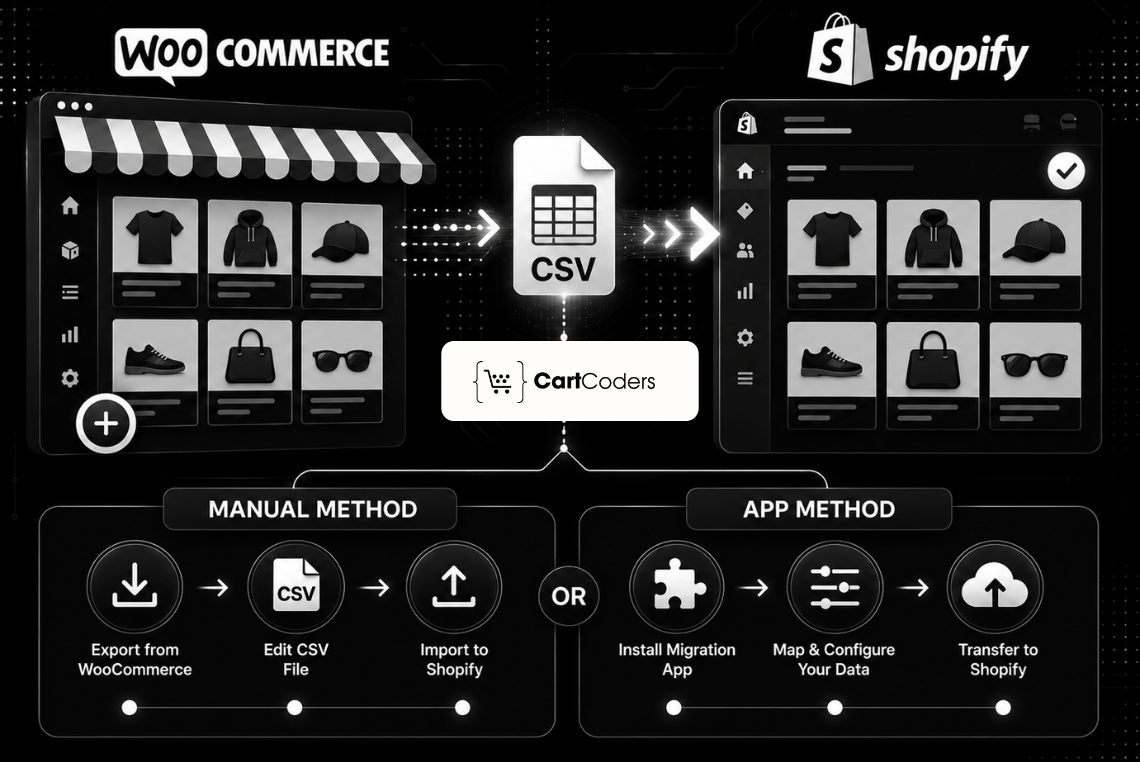
This guide covers two methods: the manual CSV import that gives you full control over every field, and the app-assisted migration that automates the data transfer for larger or more complex catalogs. By the end, you will know exactly which method fits your store and what to check after the import is done.
Quick Answer
Export your WooCommerce products as a CSV file from WooCommerce > Products > Export. Open the file in a spreadsheet editor and map the column headers to match Shopify’s product import format. Then go to your Shopify admin, navigate to Products > Import, and upload the updated CSV. Shopify will process the file and import your products. For large catalogs, a third-party migration app handles this process automatically.
What Should You Know Before Starting the Product Import?
Before you export a single file or install any tool, there are a few things worth getting clear on. The WooCommerce data structure and Shopify’s import format do not match one-to-one. Products that work perfectly in WooCommerce may need adjustments before they load correctly in Shopify.
Your Catalog Size Decides Your Method
Stores with fewer than 500 products can handle the manual CSV method without too much friction. For a larger or more complex store, a full WooCommerce to Shopify migration covers products, orders, customers, and SEO redirects as one structured process. You export from WooCommerce, clean the file in Google Sheets or Excel, and import it into Shopify directly. This approach gives you visibility at every step and costs nothing beyond your time.
Stores with 500 or more products, complex variants, or multiple product types benefit from a paid migration app. These tools handle column mapping, image migration, and format conversion automatically. They reduce the risk of data gaps and shorten the overall migration time significantly.
Product Images Need Separate Handling
Shopify does not automatically pull images from your WooCommerce server during a CSV import. You need to include the full image URL in the CSV, and Shopify will fetch each image during the import process. If the image URL is broken or inaccessible, the product imports without the image, and you will have to re-upload it manually.
Test a small batch first. Import five to 10 products with images, check the results in Shopify, and confirm the images loaded before running the full catalog.
Product Variants Require Specific Formatting
WooCommerce stores variable products with attributes like size and color in a way that differs from Shopify’s CSV structure. In Shopify’s format, each variant of a product occupies a separate row in the CSV, with the product title repeated. This is different from how WooCommerce exports variable product data, so the CSV usually needs editing before it works in Shopify.
How to Import WooCommerce Products to Shopify Manually Using a CSV?
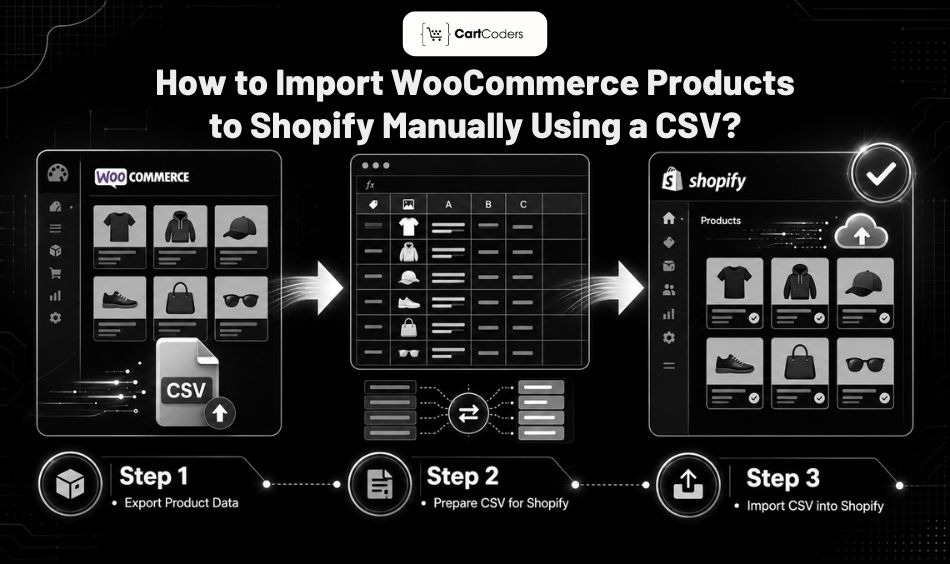
The manual method works through three stages: exporting from WooCommerce, preparing the CSV to match Shopify’s format, and uploading it to your Shopify store. Here is how each stage works.
Step 1: Export Your Product Data From WooCommerce
- Log in to your WordPress dashboard and go to WooCommerce, then select Products.
- Click Export at the top of the product list. You will see options to export all products or filter by category, type, or status.
- Select the data columns you need: product name, SKU, price, stock quantity, categories, tags, images, and descriptions.
- Click Download Export File. This saves a CSV to your computer that contains your full product catalog.
WooCommerce does not require any extra plugin for this export. The built-in export feature handles standard product data. If you use custom fields or product add-ons through a WooCommerce plugin, those fields may not export by default and may need a separate export process.
Step 2: Prepare the CSV For Shopify’s Format
Shopify’s product import CSV has specific column headers that differ from WooCommerce’s export format. You cannot upload the WooCommerce file directly. Open the exported CSV in Google Sheets or Excel and make the following adjustments.
Rename column headers
Shopify expects headers like ‘Title’, ‘Body (HTML)’, ‘Vendor’, ‘Type’, ‘Tags’, ‘Published’, ‘Option1 Name’, ‘Option1 Value’, ‘Variant SKU’, ‘Variant Price’, and ‘Image Src’. Map your WooCommerce columns to these Shopify equivalents.
Handle variants row by row
Each product variant in Shopify needs its own row in the CSV. The product title goes in the first row and stays blank for subsequent variant rows. Fill in the variant-specific columns (Option1 Value, Variant SKU, Variant Price, Variant Inventory Qty) for each row.
Add full image URLs
Paste the complete URL of each product image into the ‘Image Src’ column. If a product has multiple images, add a new row for each additional image with the same product title and only the new image URL.
Clean up special characters
Remove any characters that might break the CSV, such as unmatched quotation marks or line breaks inside description fields. Save the file in UTF-8 format to avoid encoding issues during import.
Download Shopify’s sample product CSV from your admin panel under Products > Import > Download Sample CSV. Use it as a reference while reformatting your WooCommerce data to match Shopify’s expected structure.
Step 3: Import the CSV Into Shopify
- Log in to your Shopify admin and go to Products.
- Click Import at the top right of the product list page.
- Click Choose File and select the prepared CSV from your computer.
- Choose whether to overwrite existing products with matching handles. For a fresh import, leave this unchecked.
- Click Upload and Continue, then review the column mapping Shopify presents. Click Import Products to start.
Shopify sends an email when the import finishes. The email includes an import report that lists any rows that failed, along with the reason. Review this report before assuming the migration is complete.
Also Read: Shopify Migration Checklist
Which Apps Can Help You Migrate WooCommerce Products to Shopify Faster?
If your catalog is large, your product structure is complex, or you want to migrate orders and customer data alongside products, a migration app is a faster and safer option than the manual CSV method. These apps connect directly to your WooCommerce store and handle the data transfer automatically.
LitExtension
LitExtension is one of the most widely used migration apps for WooCommerce to Shopify moves. It supports product migration, customer data, order history, reviews, and custom fields. The app maps your WooCommerce data structure to Shopify’s format automatically, so you do not need to edit any CSV files manually.
LitExtension offers a free demo migration that transfers a limited number of products and orders so you can check the output before committing to a full migration. Pricing depends on the number of entities being migrated.
Cart2Cart
Cart2Cart is a well-established platform-to-platform migration tool that supports over 85 shopping cart platforms. For WooCommerce to Shopify migration, it handles products, variants, categories, customers, and orders. It also supports SEO URL migration, which helps preserve your existing search engine rankings after the switch.
Cart2Cart runs the migration through its own servers, so it does not slow down your WooCommerce or Shopify store during the process. A free demo is available, and the full migration cost depends on the number of items.
Matrixify (formerly Excelify)
Matrixify is a powerful option for merchants comfortable working with spreadsheets. It accepts both CSV and Excel files and gives you granular control over exactly which fields get imported and how. It is particularly useful if you have custom product fields, metafields, or non-standard WooCommerce data that other tools might skip.
Matrixify handles large catalogs well and gives you a detailed import log so you can trace any issue back to a specific row or field. It is available directly in the Shopify App Store.
What Are the Most Common Issues During WooCommerce to Shopify Product Import?
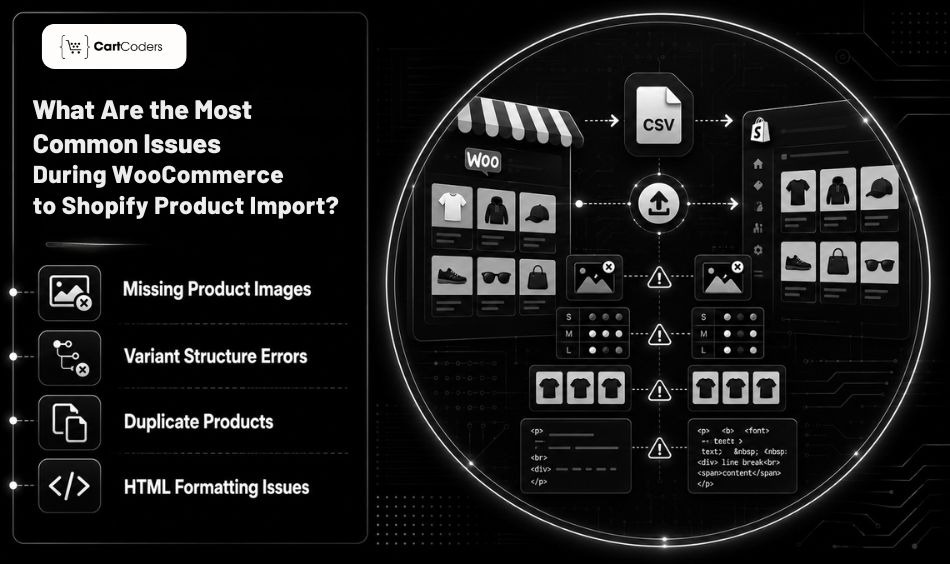
Even with a well-prepared CSV or a migration app, some issues come up regularly during product import. Knowing what to watch for lets you fix problems quickly instead of discovering them after launch.
Missing Product Images After Import
This happens when the image URL in the CSV is no longer accessible, when the WooCommerce site has restricted external access to its media folder, or when image URLs contain spaces or special characters. To avoid this, test a batch of image URLs in a browser before importing. If images are missing post-import, re-upload them directly in Shopify or fix the URLs in your CSV and re-run the import for affected products.
Variant Structure Errors
When a product’s variants do not load correctly, it is usually because the option name or option value columns were left blank or formatted inconsistently in the CSV. Shopify requires that ‘Option1 Name’ and ‘Option1 Value’ fields be filled for every row that represents a variant. An empty cell in these columns causes Shopify to skip the variant during import.
Duplicate Products Appearing in Shopify
This occurs when the same CSV is uploaded more than once without enabling the overwrite option, or when the product handle column contains duplicate values across rows. Shopify treats each unique handle as a distinct product. If handles are duplicated accidentally, you end up with multiple versions of the same product. Always check handles before importing and use the overwrite option on re-imports.
HTML Formatting Inside Product Descriptions
WooCommerce descriptions often contain HTML tags, inline styles, or shortcodes that do not render correctly in Shopify. The ‘Body (HTML)’ column in Shopify’s CSV accepts clean HTML, but shortcodes from WooCommerce plugins such as [product_page id=123] will appear as raw text in Shopify rather than rendering as intended. Strip all WooCommerce shortcodes from descriptions before importing.
How to Verify Your Products After the WooCommerce to Shopify Migration?
Running a post-import check is a required part of the migration, not an optional step. Products may import without errors but still display incorrectly on your Shopify storefront. Here is what to review before going live.
Check product counts
Go to Shopify admin > Products and compare the total product count against your WooCommerce export. A count mismatch means some products were skipped. Cross-reference the import report to identify which ones.
Verify product titles and descriptions
Spot-check 10-15 products across different categories. Confirm titles are correct, descriptions display as expected, and HTML formatting is clean. Pay special attention to products that have formatted descriptions in WooCommerce.
Test product variants
Open a sample of variable products and check that all size, color, and other attribute combinations are present. Verify that each variant has the correct price, SKU, and stock quantity.
Confirm image loading
Visit the live product pages (not just the admin view) and confirm that all primary and additional images load correctly. Check mobile view as well, since Shopify themes may display images differently on smaller screens.
Review collections and tags
WooCommerce categories migrate as tags or collections depending on the method used. Confirm that your product collections are organized correctly in Shopify and that products appear in the right collections.
Check inventory and pricing
Compare pricing and stock quantities for high-value or best-selling products between WooCommerce and Shopify to catch any import discrepancies before they affect orders.
Must Read: Optimize Your Shopify Store After Migration

Why Shopify Merchants Trust CartCoders for WooCommerce Migration?
Moving your product catalog is only one part of a successful WooCommerce to Shopify migration. The real challenge is making sure nothing breaks in the process. Product URLs need redirects, so your SEO rankings carry over. Tax settings, shipping zones, and payment gateways need to be reconfigured for Shopify. Collections need to be rebuilt to match your WooCommerce category structure. And your theme needs to reflect your brand from day one, not after weeks of adjustments.
CartCoders handles every part of this process. Every migration includes full product import with variant mapping, image transfer, SEO URL redirects, and a post-migration review before go-live.
You get a dedicated team that knows where WooCommerce-to-Shopify migrations go wrong and how to prevent them, not a one-size-fits-all tool that leaves you to troubleshoot on your own.
To Sum Up
Importing your products from WooCommerce to Shopify is a process you can handle confidently when you know what each step involves. A small catalog with straightforward products fits the manual CSV method well. A larger store with complex variants, custom fields, or thousands of SKUs is better served by a migration app that automates the heavy lifting and reduces the risk of data gaps.
Either way, the work does not end at the import. Verifying your product counts, checking variant structures, confirming image loading, and reviewing your collections before launch are what separate a clean migration from one that creates problems on day one.
Take it one step at a time. Export your WooCommerce data, prepare the CSV carefully, run a test import with a small batch, review the results, and then scale to the full catalog. If anything looks off, the import report points you to the exact row and the exact reason.
Your Shopify store is ready for what comes next. The product import is where it begins. Contact CartCoders today!
Frequently Asked Questions
Yes. WooCommerce has a built-in export feature under WooCommerce > Products > Export that saves your product data as a CSV. You do not need any third-party plugin. Once you have the file, import it directly into Shopify from Products > Import in your admin.
A standard export includes product name, description, short description, SKU, price, sale price, stock quantity, categories, tags, and image URLs. Variable product attributes and variants are also included. Custom fields from WooCommerce plugins may not export by default.
Export your WooCommerce products as a CSV, then reformat the file to match Shopify’s column structure. Rename headers, split variants into separate rows, and add full image URLs to the Image Src column. Then go to Shopify admin > Products > Import, upload the CSV, and check the import report for errors.
LitExtension, Cart2Cart, and Matrixify are the most widely used options. LitExtension suits full migrations, including orders and customers. Matrixify gives you spreadsheet-level control over the import. Cart2Cart works well for large catalogs and supports SEO URL migration.
Not through CSV import. You need to include the full image URL in the Image Src column, and Shopify fetches each image during the import. If you use a migration app like LitExtension or Cart2Cart, images are typically transferred as part of the process.
A manual CSV import for a 100-product catalog takes 2 to 6 hours, including file preparation, upload, and basic validation. For catalogs with 1,000 or more products, a migration app takes 5 to 15 hours to complete the transfer, including setup, syncing, and checks. Post-migration review adds 1 to 6 hours, depending on catalog size and complexity.
Standard CSV import does not transfer reviews. A migration app like LitExtension can include reviews in the full migration. You can also use a Shopify review app that supports CSV import and upload your WooCommerce reviews manually after the product migration.
Check the import report Shopify sends by email after the import finishes. It lists every skipped row and the reason. Common causes are missing required fields, CSV formatting errors, and broken image URLs. Fix the affected rows and re-import only those products.


