Custom Engagement Solutions
Unlock tailored solutions with a free, no-obligation strategy session.
Expert Developers & Engineers on Demand
Scale Your Team with Skilled IT Professionals
Expert Guidance for Digital Transformation

Manually loading products to a Shopify store could be time-consuming, especially when dealing with huge stores. Nonetheless, Shopify provides an alternative to accelerate the process. It is possible to add products in bulk through Excel or CSV files. Such an approach will save you hours of work and mistakes.
Here, we are going to discuss the step-by-step process of importing products into Shopify using Excel or CSV. You will also understand how to correct common mistakes, what to place in your product data file, and how to utilize a Shopify product import service to upload your products in the smoothest and safest way.
So, let’s explain the process of handling large product uploads in a simple and easy-to-understand manner.
Regardless of migrating to the platform or adding one hundred new SKUs, a CSV file will make your work quicker and simpler. Shopify enables you to add thousands of products in few minutes through a standard CSV template.
These are the best reasons why merchants prefer to utilize this mode:
When your products number over 10-20, it is recommended that you avoid manual uploads and instead use the Shopify CSV import directly.

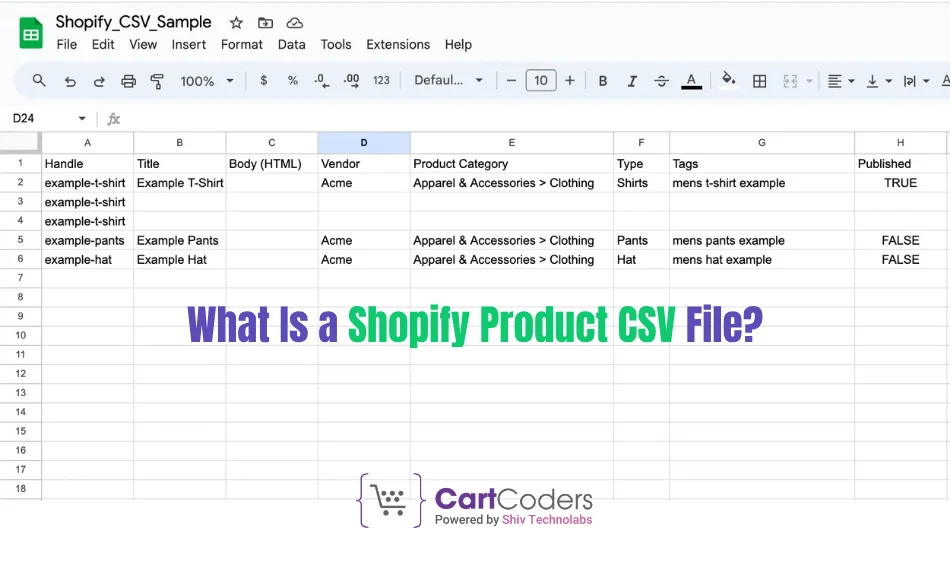
CSV (Comma Separated Values) is a basic format in which product information is saved such as title, price, images, inventory, and categories among others. Shopify relies on a particular structure of CSV files to be able to read it and structure product data appropriately.
Each row in the file is a product or a product variant. Columns include details like:
You can either download Shopify’s sample CSV template or export your existing product data to see the format.
Here are simple steps to bulk upload products to Shopify. You can do it yourself or hire a professional service to do it for you.
Get started by making a list of your product on MS Excel or Google sheet. Include all necessary details in columns.
Each row should be a product or a variant.
Make sure to include:
When you are done with your sheet, you can save in a csv file.
Note: When saving, save in UTF-8 format into CSV. It is the only encoding that is accepted by Shopify.
And when you are not actually sure of the structure, you have to go to Shopify Admin > Products > Export. This provides you with a sample file.
Check the format of your file against the format of Shopify and ensure that the columns either as required. This guarantees the smooth flow of Shopify CSV importation.
Shopify reads the file and starts adding products. If there are any errors in the file, Shopify will show them before import.
For large stores, this process can take several minutes.
After the upload, go through your product pages. Check for:
Fix any missing data by re-importing an updated CSV file.

Even if your file looks fine, you may face some issues. Here are common errors during Shopify product upload:
To avoid these, use Shopify’s exact format and test with 2–3 products before doing a full import.
If your store has complex products or extensive catalogs, a DIY approach may cause errors or delays. Many merchants hire experts for Shopify data migration services or import support.
Here’s how professional services make things easier:
If you’re moving from WooCommerce, Magento, or another platform, a Shopify expert can migrate full catalogs using automation. They also offer a full Shopify product import service for new stores and re-platforming needs.
To avoid errors or lost data, follow these simple tips:
Shopify has limits on how much data you can import:
If your product list is very large, split it into smaller CSV files and upload them one by one. This avoids timeout or file size errors.
If you prefer to avoid spreadsheets, there are other ways to handle product import:
Tools like Matrixify allow you to manage imports with better control. You can map columns, schedule uploads, and fix errors faster.
Developers can create scripts using Shopify API to automate product uploads.
You can alternatively hire a Shopify migration service to manage the process, end to end.
These options are time-saving, particularly when operating big stores with thousands of SKUs.
Using a CSV file, you can safely and quickly upload products to Shopify in bulk. This decreases the manual effort, eliminates human errors, and allows you to open your store quicker.
However, one should pay attention to the proper structure, present clean information, and use the required tools. When you are uncertain or your catalog is complicated, collaborate with a team such as CartCoders. We provide product uploading and Shopify data migration services so that every aspect works properly.
Waiting to import your products to Shopify without any hassles?
Let CartCoders help you save time and launch your store faster. Get expert help for all your Shopify data needs.
Projects delivered in 15+ industries.
95% retention rate, building lasting partnerships.
Serving clients across 25+ countries.
60+ pros | 10+ years of experience.