

Shopify store owners across India rely on Razorpay to accept customer payments through cards, UPI, net banking, and wallets. A Razorpay Shopify integration connects this payment gateway directly to your store checkout, and stores with custom workflows may also need expert Shopify integration services for cleaner data flow. Customers can then pay through their preferred method without leaving your site.
Many merchants search for clear setup steps, but official documentation often skips practical questions. How much does Razorpay charge per transaction? Does the setup need developer help, or should you hire Shopify developers when checkout, API keys, apps, or payment rules need extra technical care?
This guide covers both the manual setup process and a professional integration option. It also breaks down real pricing, so you know what to expect before you connect your account.
Quick Answer
To connect Razorpay to Shopify, install the Razorpay Secure app from the Shopify App Store, add your Razorpay API key and secret, then activate the app. Razorpay’s Standard plan charges 2.70% + $0.30 per transaction on card payments, with no monthly subscription fee. Setup takes under an hour for most stores.
What Is Razorpay and Why Shopify Merchants Use It?
Razorpay is a payment gateway built for businesses in India. It processes more than 100 payment methods, including UPI, credit cards, debit cards, net banking, and popular wallets.
Shopify merchants choose Razorpay because it settles domestic payments within two to three business days. It also runs fraud checks on every transaction, which protects both the store and the customer.
How to Connect Razorpay to Shopify
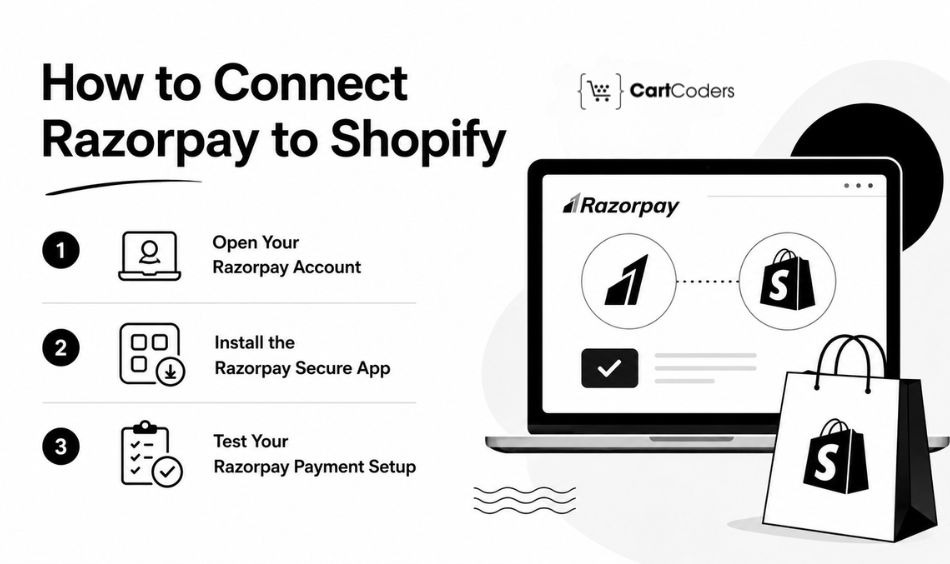
You can connect Razorpay to Shopify in three main steps, while custom payment logic may need Shopify payment gateway extension development for a more tailored setup. Each step takes only a few minutes once your Razorpay account is verified.
Step 1: Open Your Razorpay Account
Sign up on the Razorpay website and submit your KYC documents. Razorpay usually reviews these within two to four business days. The team may contact you by email, SMS, or WhatsApp if they need extra details. Once your account is verified, you receive an API key and a secret key.
Step 2: Install the Razorpay Secure App
Search for “Razorpay Secure” in the Shopify App Store.
This app is built by Razorpay for direct Shopify integration, but stores with special payment rules can work with a Shopify checkout extension development company for advanced checkout control. It works with themes on the Shopify 2.0 architecture. Most merchants find it within the top three search results.
Log in to your Shopify admin panel and click Connect.
This step links your store to the Razorpay Secure app. Shopify will ask for permission to share basic store data. Approve this to continue the installation.
Select “I am an existing user” on the landing page.
New merchants who have not created a Razorpay account should register first. Existing users skip ahead to the credential step. This choice decides which setup path the app shows next.
Enter your Razorpay API key and secret key, then click Activate.
You can find both values inside your Razorpay dashboard under API Keys. Paste them exactly as shown, since even a single character error blocks activation. Once activated, Razorpay appears as a payment option at your Shopify checkout.
Step 3: Test Your Razorpay Payment Setup
Testing confirms that customers can complete real transactions without errors, and a custom Shopify payment gateway integration plan can help compare different payment options before launch.
Go to Shopify Settings, then Payments, and open the Razorpay Secure section.
This is where you manage every setting tied to the app. Keep this page open while you run your test order. You will return here to turn test mode off later.
Enable test mode and save your changes.
Test mode lets you simulate a full checkout without moving real money. It is the safest way to confirm the connection before going live. Always turn this off once testing is complete.
Place a test order and pay with Razorpay’s test card details.
Razorpay publishes sample card numbers for this exact purpose in its documentation. Complete the checkout the same way a real customer would. This confirms the full payment flow end to end.
Confirm the order status inside your Shopify dashboard.
A successful test order should show as paid in Shopify within seconds. If it does not, recheck your API credentials before contacting support. Once confirmed, disable test mode and start accepting live payments.
Should You Use a Professional Shopify API Integration Service Instead?
The manual setup works well for standard stores with simple checkout needs. Businesses with custom checkout flows, multi-currency pricing, or ERP systems often need expert Shopify API integration support instead.
CartCoders handles Razorpay and other Shopify API integrations through a clear four-step process.
Custom integration planning
The team reviews your business goals, required data points, and desired checkout features. This step prevents rework later by aligning the integration with your actual sales process.
Store integration
Once the plan is set, the team builds the connection between Razorpay and your live Shopify store. This includes matching your theme, checkout flow, and any existing apps.
Quality testing and bug fixes
The integration goes through functionality, security, and performance testing across devices. Any issue found here gets resolved before the store goes live with real customer payments.
Ongoing support and maintenance
CartCoders continues to monitor the integration after launch. This covers technical support, updates, and improvements as your store scales.
Razorpay Pricing and Charges for Shopify Stores
Razorpay’s Standard plan follows a pay-as-you-go model. There is no monthly subscription fee. You pay only a per-transaction rate once a sale goes through, and every rate below is priced in USD with no additional tax applied.
| Payment Method | Standard Plan Fee | Cost on a $100 Order (USD) |
| Credit & debit cards | 2.70% + $0.30 | $3.00 |
| Foreign cards | +1.2% extra on top of the card rate | $4.20 |
| ACH Direct Debit | 0.5% (capped at $5) | $0.50 |
Credit and debit card payments cost 2.70% + $0.30 per transaction on the Standard plan. On a $100 order, that works out to $3.00 total.
Foreign cards add an extra 1.2% on top of the standard card rate. A $100 order paid with a foreign card costs about $4.20 once both fees are combined.
ACH Direct Debit costs 0.5% per transaction, capped at $5. This makes it the cheaper option for larger orders. A $2,000 order paid by ACH costs $5 instead of $10, since the fee stops increasing once it hits the cap.
Businesses that need volume-based pricing, or that process more than $10 million a year, can contact Razorpay’s sales team for Custom or Enterprise pricing instead of the Standard plan.
Is Razorpay Free to Use?
Razorpay is free to sign up for, with no monthly subscription cost on the Standard plan. Shopify merchants pay only the per-transaction rate once a sale goes through. Early-stage businesses and stores processing more than $10 million a year can request Custom or Enterprise pricing directly from Razorpay’s sales team.
Common Problems When Connecting Razorpay to Shopify
Even after the basic setup is complete, a few small issues can stop Razorpay from working properly on Shopify. Most problems happen because of test mode, incorrect API credentials, pending KYC verification, or app activation errors. The good part is that these issues are usually easy to fix once you know where to check.
Razorpay does not appear as a payment option at checkout.
This usually means test mode is still active, or the app was not activated after entering API credentials. Check the Razorpay Secure settings page inside Shopify first.
API key or secret key errors during activation.
Copy both values directly from the Razorpay dashboard instead of typing them. Extra spaces or missing characters are the most common cause of this error.
KYC verification delays.
Razorpay reviews documents in two to four business days on average, though incomplete submissions take longer. Respond quickly to any WhatsApp, SMS, or email requests for extra details.
Test orders succeed, but live orders fail.
This points to test mode being left on, or a mismatch between test and live API keys. Confirm the correct live credentials are entered before launch.
Benefits of the Razorpay Secure App for Shopify
- Faster Checkout: A simplified payment flow reduces the steps between cart and confirmation. Fewer steps mean fewer chances for customers to abandon their cart.
- Stronger Security: Razorpay uses encryption and fraud detection tools on every transaction. This builds trust with customers who are paying online for the first time.
- More Payment Options: Cards, net banking, UPI, and wallets are all supported through one integration. Customers can pay however they prefer, which improves conversion rates.
- Real-time Transaction Monitoring: The Razorpay dashboard shows live sales data and customer payment behavior. This helps you spot issues quickly and make informed business decisions.
- Easy Customization: The app works with minimal setup time and offers branding options inside the checkout experience. Store owners can match the payment flow to their brand identity.
Need Help With a Custom Razorpay Setup?
Some Shopify stores need more than the standard Razorpay Secure app, especially when checkout is customized or connected to other business systems. CartCoders builds Shopify payment gateway extensions and full API integrations for stores at this stage.
The team has handled Razorpay, multi-gateway, and ERP-connected checkout projects for Shopify merchants across industries, with support that continues after launch.
Talk to CartCoders today and get your Razorpay integration reviewed or built end-to-end.
Conclusion
Connecting Razorpay to your Shopify store takes three straightforward steps: account setup, app installation, and testing. Most stores can complete this in under an hour.
Understanding the real cost matters just as much as the setup. Razorpay’s Standard plan charges 2.70% + $0.30 per transaction on cards, with no hidden monthly fees. For stores with custom checkout needs, a professional integration service can handle the setup end-to-end and provide support afterward.
FAQs
Card payments cost 2.70% + $0.30 per transaction on the Standard plan. Foreign cards add an extra 1.2%, and ACH Direct Debit costs 0.5%, capped at $5.
Yes, sign-up and setup are free. Razorpay only charges a fee once a transaction succeeds, with no monthly or annual charges on the standard plan.
Manual setup through the Razorpay Secure app usually takes under an hour once your account is verified. Custom integrations through a development team can take longer depending on scope.
Yes. Foreign cards are supported with an extra 1.2% on top of the standard card rate, and ACH Direct Debit is available at 0.5% per transaction, capped at $5.
This usually happens when test mode is still on, or the app was not fully activated. Check the Razorpay Secure settings inside Shopify to confirm activation.
The platform fee is the per-transaction rate Razorpay charges once a payment succeeds. On the Standard plan, it is 2.70% + $0.30 for cards, with an extra 1.2% for foreign cards and 0.5%, capped at $5, for ACH Direct Debit.
Yes. Razorpay uses PCI DSS compliance, encryption, and fraud prevention tools to protect every transaction on your Shopify store.
Yes. You can install the Razorpay Secure app alongside or in place of your current gateway, then test thoroughly before making it your default payment method.


